
BIM 360 Team and C4R is an additional service from Autodesk. It is not cheap, but opens a lot of doors. I know at least one firm, BKV Group, with over 100 Revit users who do ALL of their projects in C4R; one of their BIM Managers (Mike Matheny) and I used to work together. This allows any staff member to work from home if they have a sick kid, or from a coffee shop if they just want to get out of the office for a while. Plus, this also allows all projects to work with any structural and/or MEP consultants via the Cloud with live linked models. Internally at the multi-discipline firm I work at, we have been using live linked Revit models every day, on every project, since Revit Structure and Revit MEP first came out.
Here are the basic steps to get started...
Initial Setup Done by Each Person
- FYI: An 'Administrator' of this Autodesk service within your firm needs to invite you and give you access to C4R.
Log into Team 360 and make sure you can see your Hub & Projects, as shown in the image below. Save this page as a Favorites in
your web browser.
Then, install the Desktop Connector for BIM 360
(everyone needs to do this). This will give you the ability to easily share other
files, like Excel and PDFs.

Select the correct version of...
Desktop Connector (usually the
first one)…
Follow prompts to install…

You now have a Dropbox/Google Drive-type folder on your
computer (see next image). Anyone can create folders and place
files there to share within your group.

In Revit, log-in using your Autodesk user name and password
(everyone needs to do this)…

Getting the Revit Model into the Cloud (only one person does this for each Revit model)
Only one person needs to do the initial setup in
Revit to make the project sharable in the cloud. On the Collaborate tab, in
Revit, Click the Collaborate command.

Select the Collaborate using the Cloud option (this only
works with Autodesk’s cloud service)…
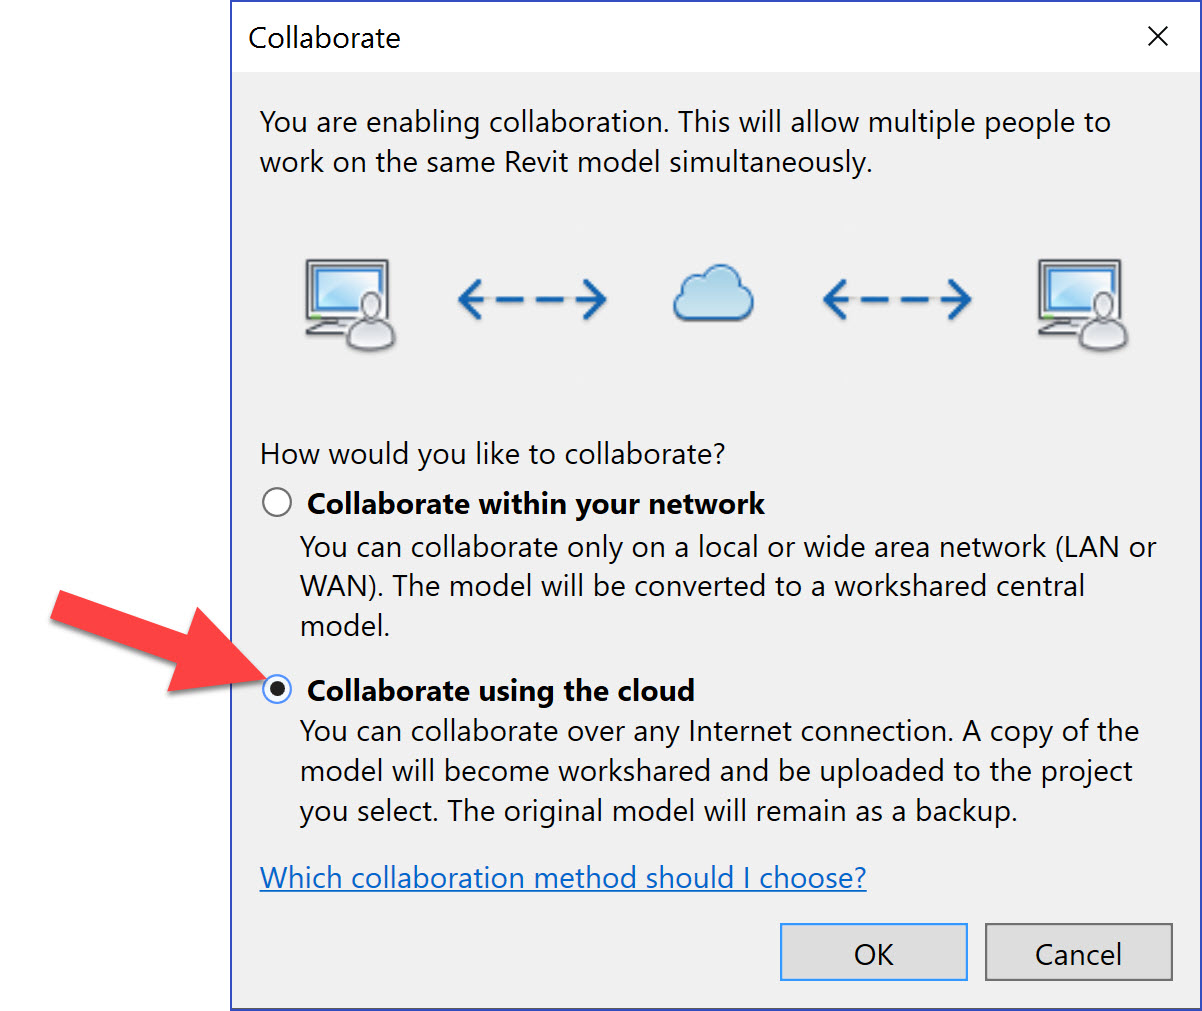
Make sure the correct project is selected.

The file is being uploaded to the cloud.

The file has been uploaded to the cloud.

- Link: How do I invite team members link: http://help.autodesk.com/view/RVT/2018/ENU/?guid=GUID-ABFFFEE6-2C6D-4779-B508-A1C4BC0C4885
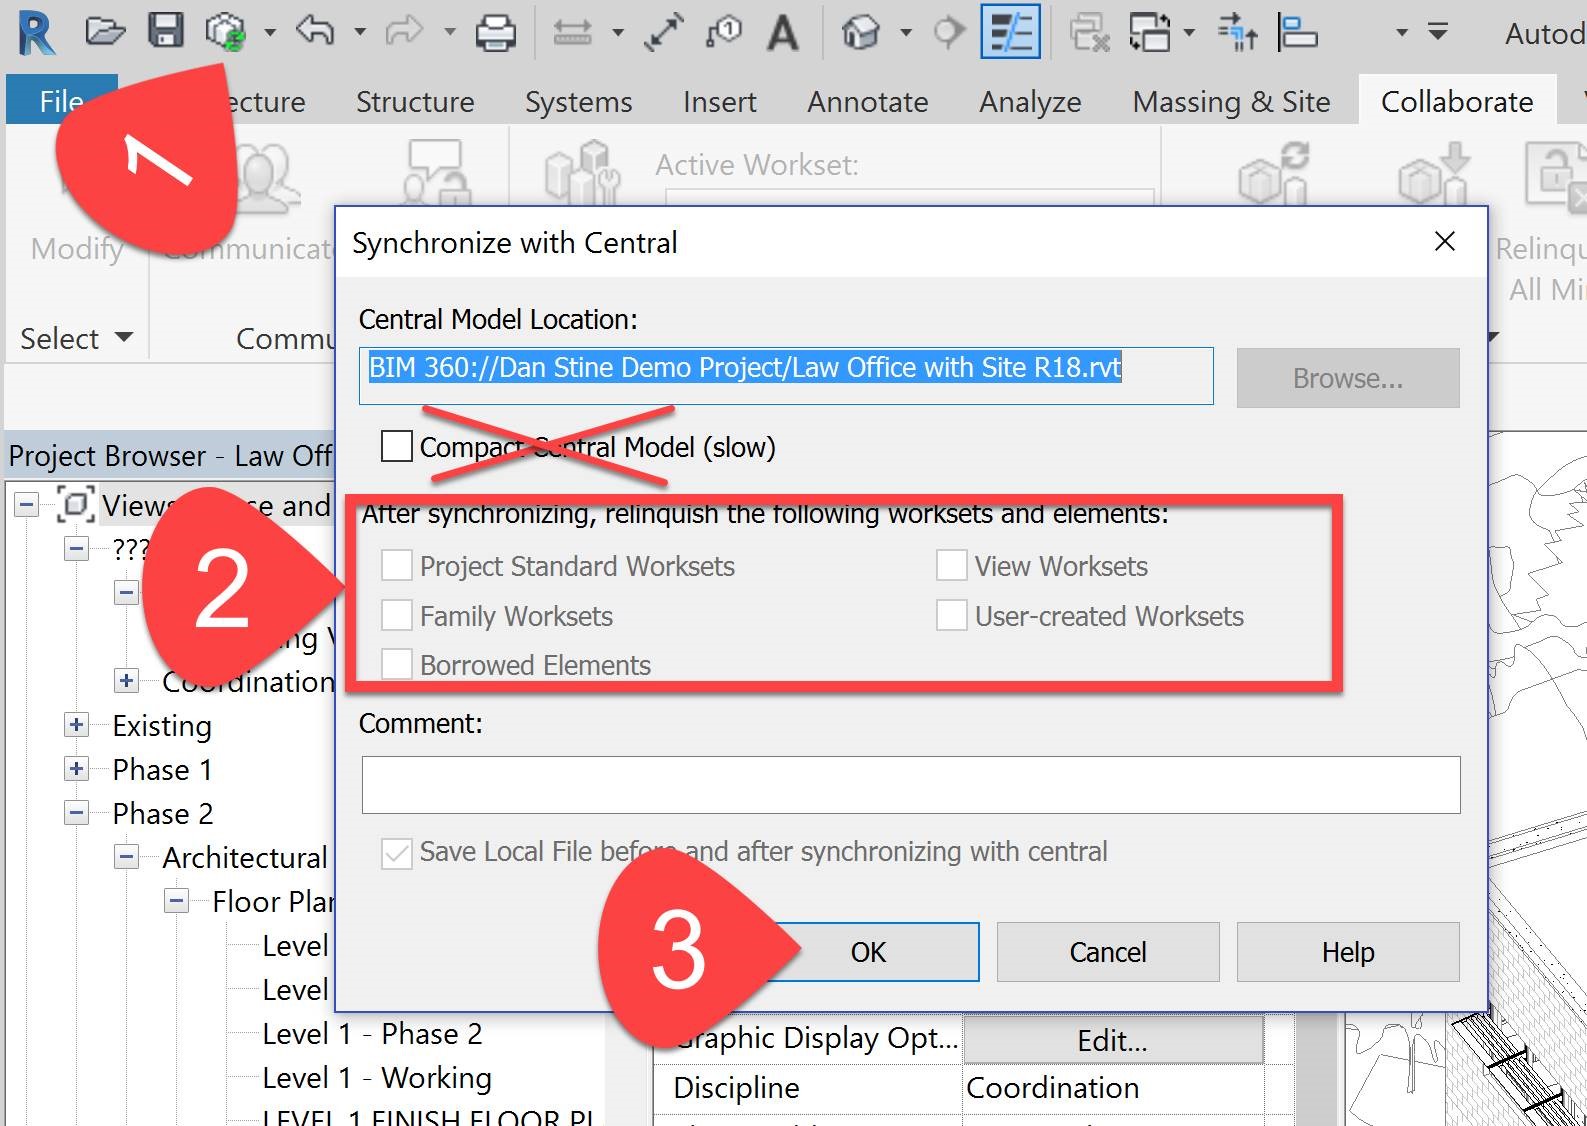
When done setting up the project, use the Sync with
Central command to save all changes before closing. In this dialog, be sure
to check all the boxes, if check-able, in the area highlighted with the red box
in the image below.


Once set up, this is all you have to do each time you want to work on the project
Anyone who works on the project, now follows these
steps every time they need to work on the project. You must be connect to the
internet with reasonable internet speed.
I did not have the BIM 360 icon for come reason - it should be installed by default in Revit 2018. My friend Nauman Mysorewala (@BIMologist) pointed to the install files located in my deployment folder:
- \Img\x64\PACR\PACR.msi
- \Img\x64\RCAO\RCAO.msi


While working in the project, use the normal save icon
(floppy disk) to save to your local computer all you want. Every 30 minutes, be
sure to use the Sync with Central command to save your changes to the
cloud (this is also when you get other's changes as well). But do not do the
Sync w/ Central too often as it will slows things down for the project team as
they will not have access to the model while you are doing this.
You will also have access to the Communicator dialog, which
should open automatically. You can see who is in the model and send them
messages.

Nauman also commented:
"You need to create a project and invite team members first, before the Collaborate button in Revit.
Make sure the license is assigned by Contract
Manager/Software coordinator (lic available for monthly or yearly terms. ) Each person working on the team needs to be added as a
member."