
Re: Custom tile pattern needed ASAP!
Architects and interior designers are going to love this!
Finding or creating fill patterns for Revit, or Hatch patterns for AutoCAD, can be a huge pain. Today I will share a nice tool, which is free, we can use to quickly create any model/drafting pattern... and it is done within Revit. Plus, it is free. I know I already said that, just saying it again for emphasis:) This is made possible by a Revit add-in called pyRevit.
pyRevit is a set of custom tools for Autodesk Revit based on a programming langue called IronPython. This suite of tools was created, and is maintained by, Ehsan Iran-Nejad who is an architect in Portland Oregon, USA. Given his stellar developer skills, I love that he pointed out in his GitHub profile that he is an "Architect, of actual buildings".

Additionally...
Here is where you get "the goods" and a link to one of the many videos on YouTube:
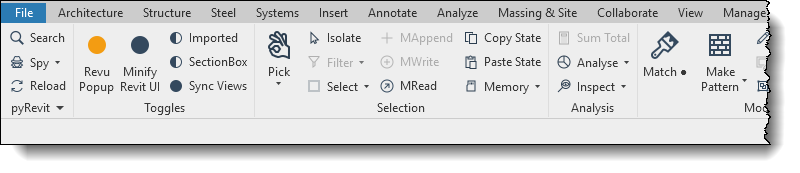
Once installed, you will have a new pyRevit tab within Revit. Here it is in Revit 2019.

On his Simply Complex podcast, Marcello Sgambelluri interviewed Timon Hazell of Silman in DC about pyRevit among other things. Check it out here:
I wrote these posts on Fill Patterns, in general, in the past:
Now, lets see how this Pattern Maker tool actually works in Revit. We will do this within the provided sample Revit project. When pyRevit is installed, you get a Revit project file with a bunch of patterns already created. Not only that, the original linework is still there so you can see how they were created with this tool
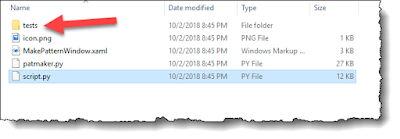
To access the provided sample file, in Revit, hover your cursor over the Make Pattern command and click it while holding down the Alt key on your keyboard. Now a Windows Explorer (or File Viewer) window opens to the folder shown below. Open the "tests" folder and you will find the Revit file.
The first view is a single drafting pattern example...
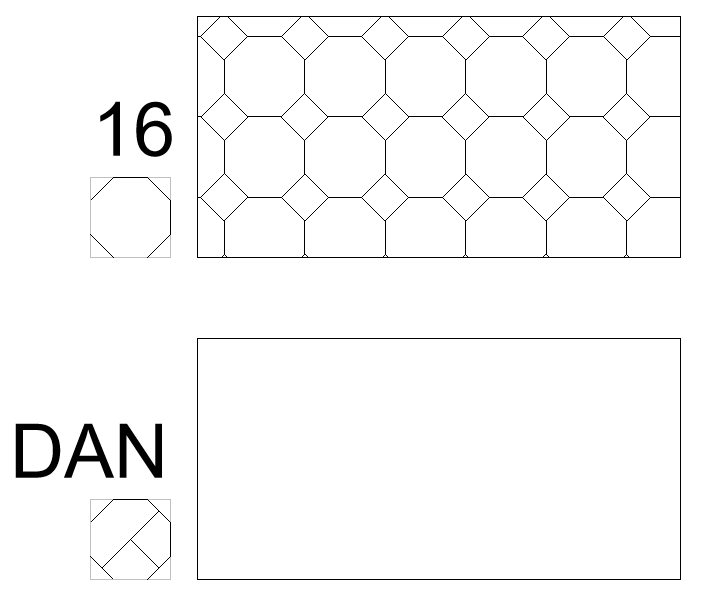
Another view has several model pattern examples...

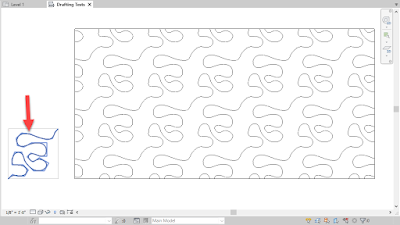
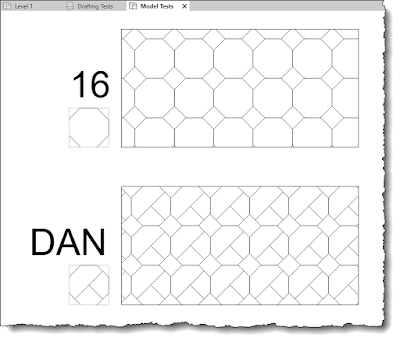
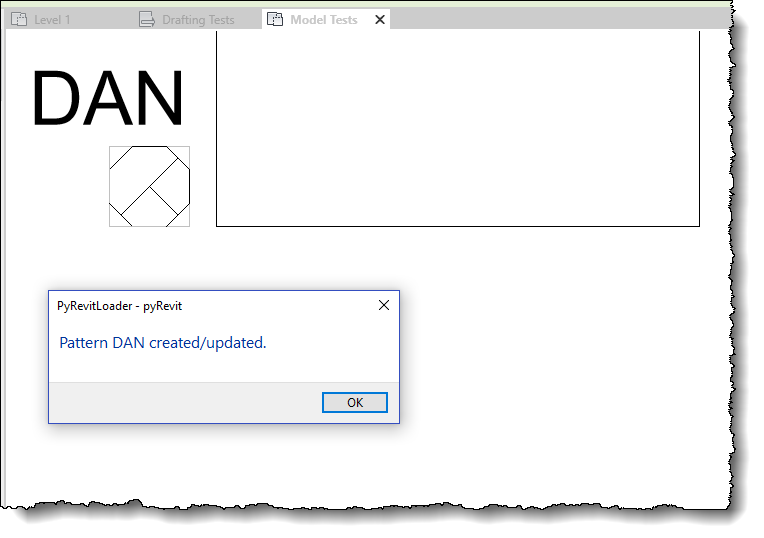
I will make a variant of pattern "16" shown here. Notice I just added two lines within the original pattern. I will also name it "DAN" just so it stands out from all the other pattern names.

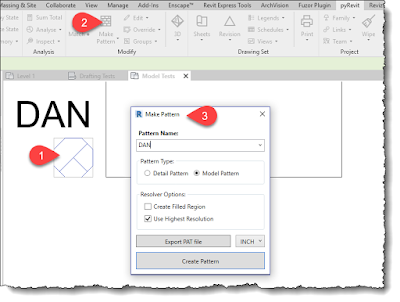
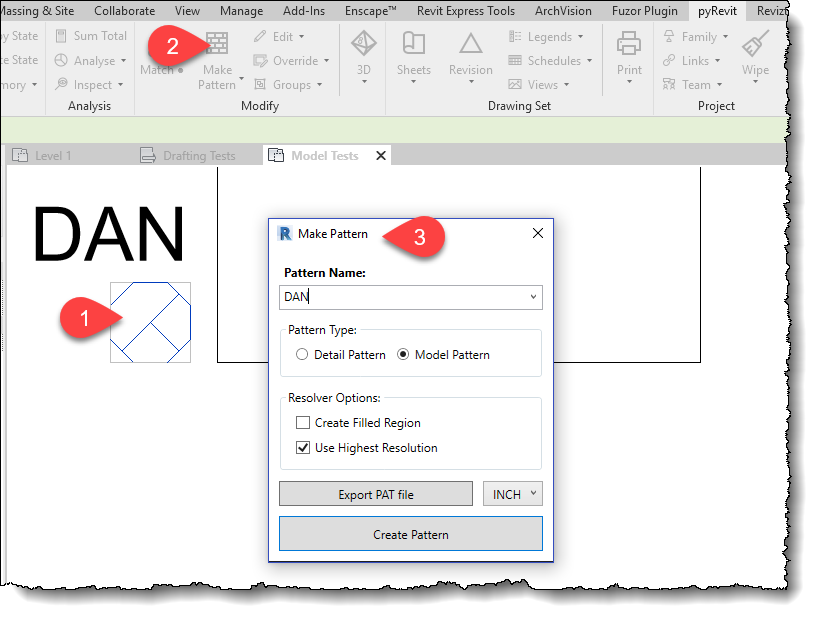
To start the creation process, select the lines that define the pattern. Do not select the reference perimeter lines. They are not even needed, other than we need to be able to pick the lower left, and upper right, points at the end of the task.
With the lines selected, click the Make Pattern command. The following dialog appears. Enter a pattern name, decide on Detail or Model pattern and if the pattern will be created directly within the current project or written to an external PAT file. TIP: If you create it within the current project, you can Copy/Paste the pattern to other projects.
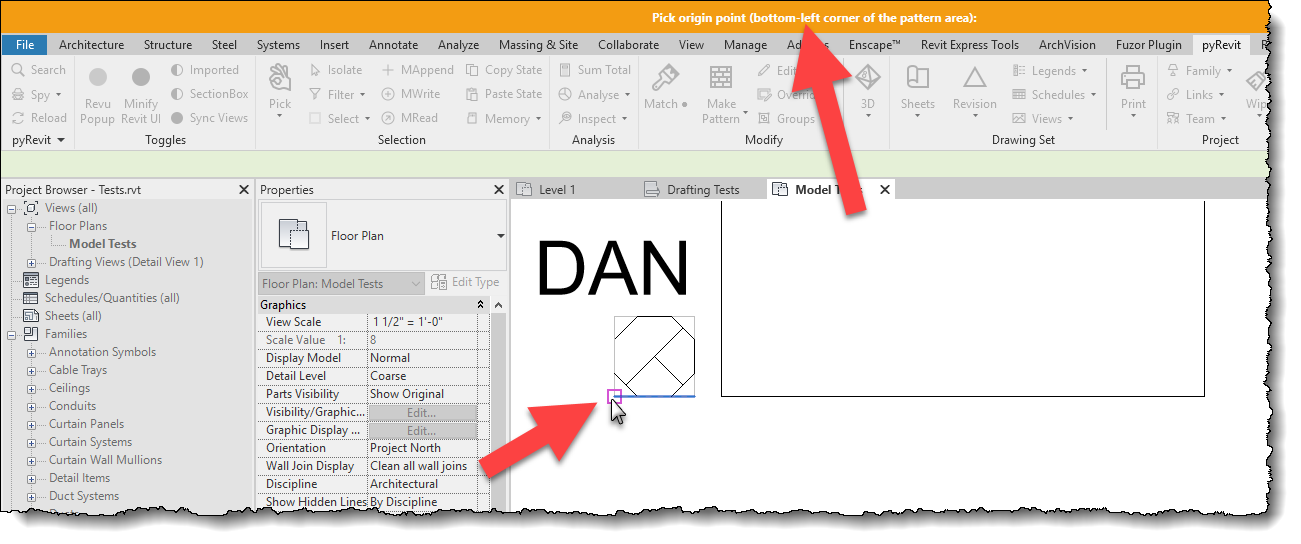
When you click Create/Export, you will see an unusual, but easy to understand, prompt to select the lower left corner of you pattern area.
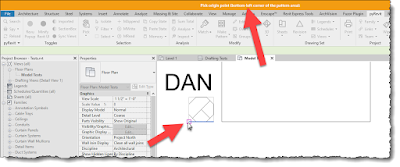
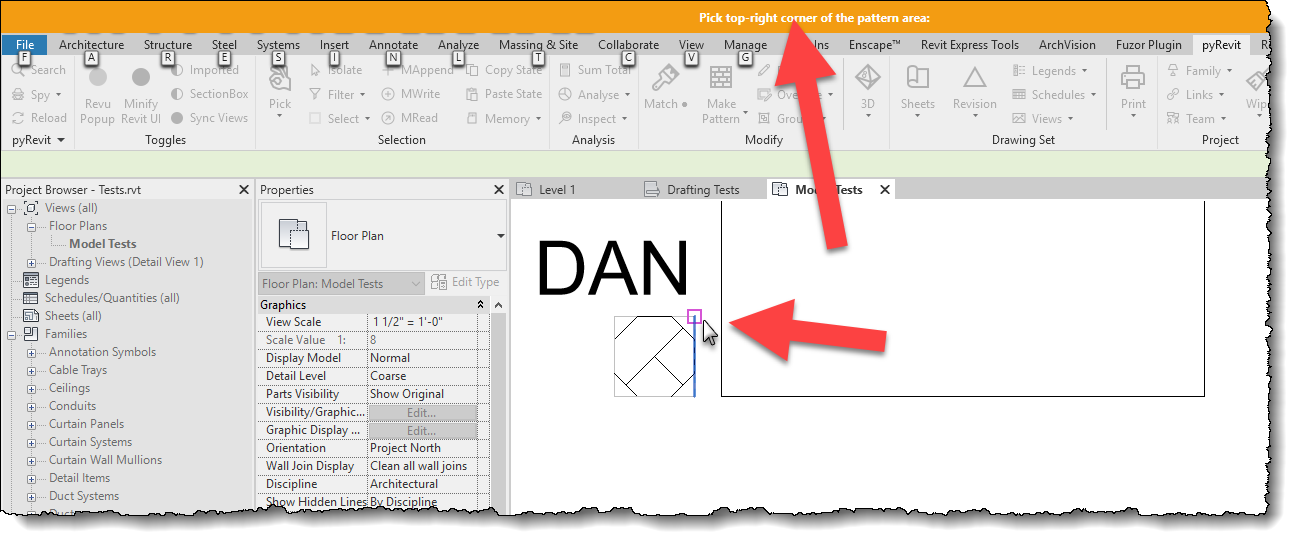
After picking the lower left, you are then instructed to pick the upper right.
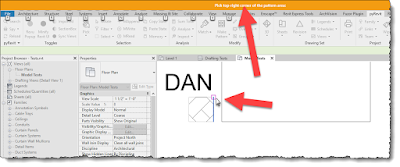
Success!

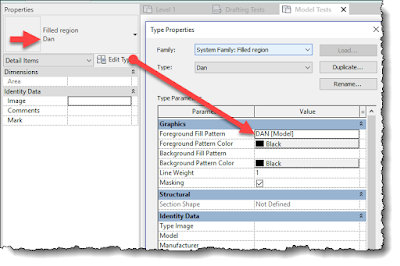
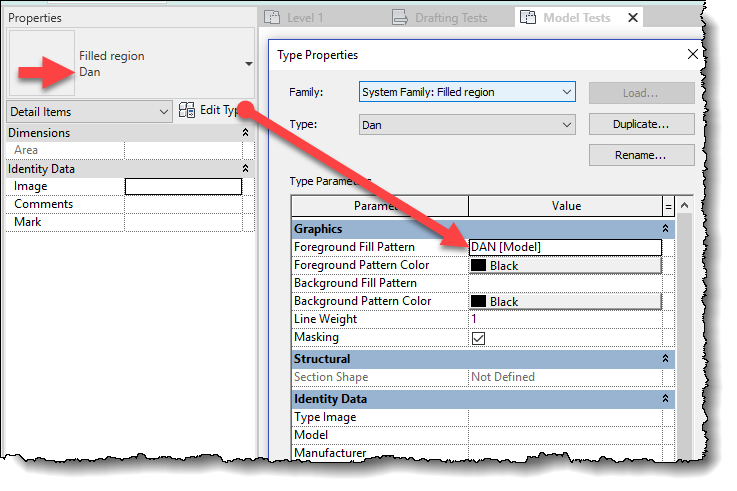
Now, manually create a fill pattern type that uses the new pattern definition!
And, here is the new pattern used in the project. Super easy!
Happy pattern making everyone... for free. Thanks for making life easier, Ehsan!
Stay tuned as I explore some of the other tools pyRevit has to offer.
For BIM Chapters updates, follow @DanStine_MN on Twitter
Architects and interior designers are going to love this!
Finding or creating fill patterns for Revit, or Hatch patterns for AutoCAD, can be a huge pain. Today I will share a nice tool, which is free, we can use to quickly create any model/drafting pattern... and it is done within Revit. Plus, it is free. I know I already said that, just saying it again for emphasis:) This is made possible by a Revit add-in called pyRevit.
pyRevit is a set of custom tools for Autodesk Revit based on a programming langue called IronPython. This suite of tools was created, and is maintained by, Ehsan Iran-Nejad who is an architect in Portland Oregon, USA. Given his stellar developer skills, I love that he pointed out in his GitHub profile that he is an "Architect, of actual buildings".
Additionally...
Here is where you get "the goods" and a link to one of the many videos on YouTube:
- GitHub page: https://eirannejad.github.io/pyRevit/
- YouTube video: How to pyRevit: Make Pattern Tool
Once installed, you will have a new pyRevit tab within Revit. Here it is in Revit 2019.

On his Simply Complex podcast, Marcello Sgambelluri interviewed Timon Hazell of Silman in DC about pyRevit among other things. Check it out here:
I wrote these posts on Fill Patterns, in general, in the past:
Now, lets see how this Pattern Maker tool actually works in Revit. We will do this within the provided sample Revit project. When pyRevit is installed, you get a Revit project file with a bunch of patterns already created. Not only that, the original linework is still there so you can see how they were created with this tool
To access the provided sample file, in Revit, hover your cursor over the Make Pattern command and click it while holding down the Alt key on your keyboard. Now a Windows Explorer (or File Viewer) window opens to the folder shown below. Open the "tests" folder and you will find the Revit file.

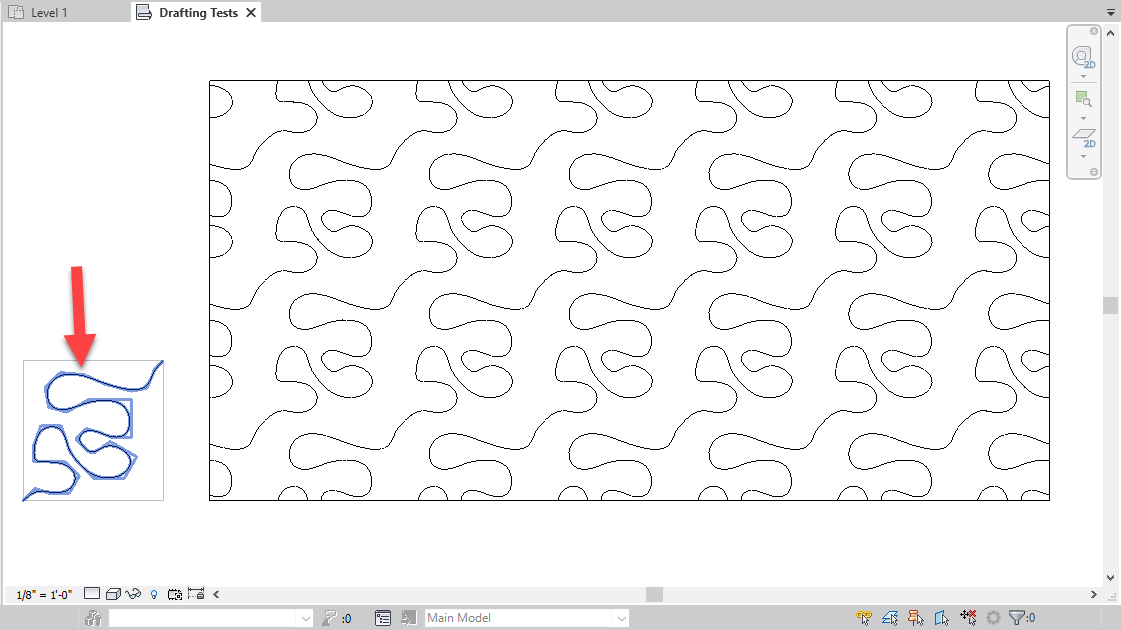
The first view is a single drafting pattern example...
Another view has several model pattern examples...
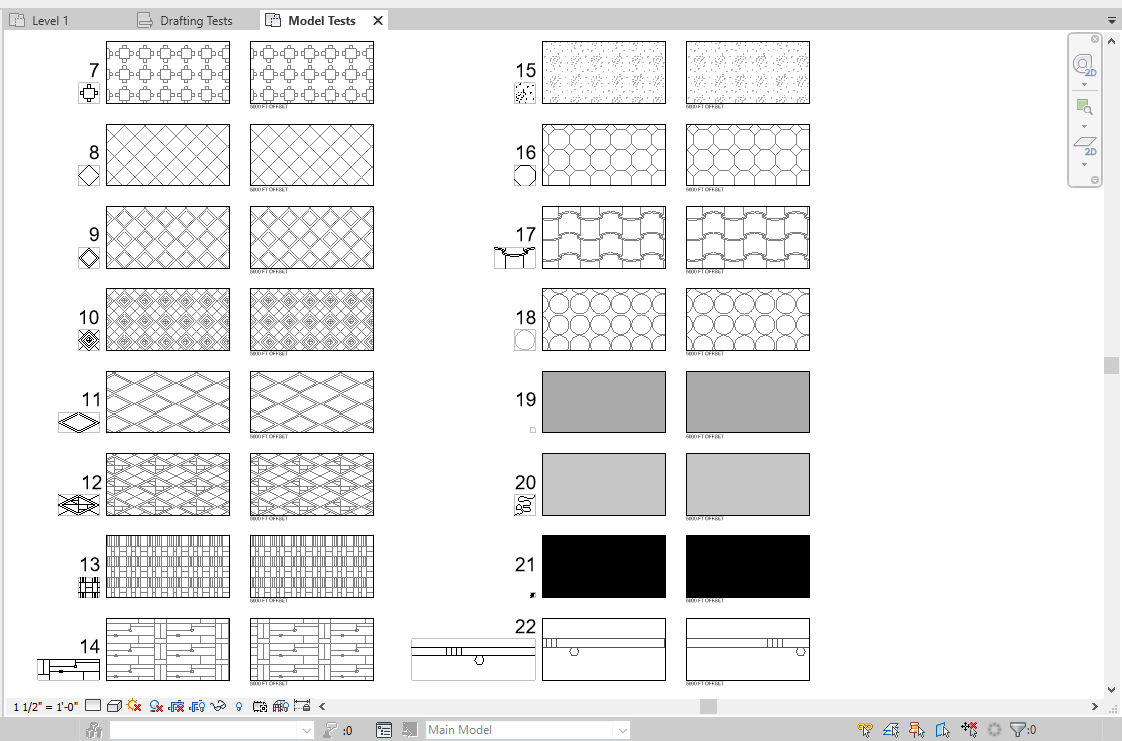
I will make a variant of pattern "16" shown here. Notice I just added two lines within the original pattern. I will also name it "DAN" just so it stands out from all the other pattern names.
To start the creation process, select the lines that define the pattern. Do not select the reference perimeter lines. They are not even needed, other than we need to be able to pick the lower left, and upper right, points at the end of the task.
With the lines selected, click the Make Pattern command. The following dialog appears. Enter a pattern name, decide on Detail or Model pattern and if the pattern will be created directly within the current project or written to an external PAT file. TIP: If you create it within the current project, you can Copy/Paste the pattern to other projects.
When you click Create/Export, you will see an unusual, but easy to understand, prompt to select the lower left corner of you pattern area.
After picking the lower left, you are then instructed to pick the upper right.
Success!
Now, manually create a fill pattern type that uses the new pattern definition!
And, here is the new pattern used in the project. Super easy!

Happy pattern making everyone... for free. Thanks for making life easier, Ehsan!
Stay tuned as I explore some of the other tools pyRevit has to offer.
For BIM Chapters updates, follow @DanStine_MN on Twitter