
Today's post comes compliments of industry expert Pieter Schiettecatte from A+I in New York City. Click here to see all this posts on this blog.
I want to share a workaround we’ve developed to set up a custom Enscape asset library. We’ve been using this workflow for 10 months and it has worked well for us. That said, use this at your own risk because it’s not officially supported by Enscape.
To create an Enscape asset you will need:
However, for this tutorial we will be using the powerful new Blender 2.82, as it’s free, open source and has a built in .gltf exporter.
keep reading to learn more...
In this tutorial, we will be using Blender to convert the ‘Kai Lounge Chair’ model into an Enscape asset.
You can use Blender to render out a preview (the backdrop, lighting and camera are on the ‘rendering setup’ collection). Or you can render it later in Enscape and update the thumbnail. If you don’t add a thumbnail the asset creator will use a black square instead.
You can download the thumbnail for the Kai chair here.
Fill in the form and add all files created in the previous steps.
Click Save as.
 This will enable an extra panel in the Enscape general settings dialog that allows you to add a custom library.
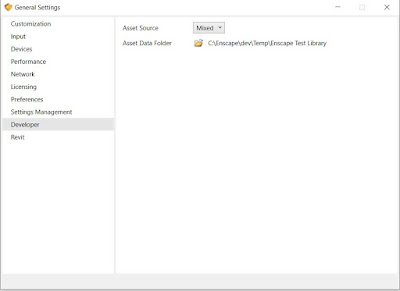
On this panel, there are 3 options
Now, copy the files generated in step 4 (both the .json file and the data folder) into your library, using a subfolder ( D:\Asset Library\assetname\Output\ ). Note that the 'Output' part is not optional and it's capital sensitive (so not 'output').
We're done! Check the library panel in Enscape. You should see your asset there! If you had trouble following the tutorial, you can download an example of the files here.
Closing note:
Pieter's tutorial first appeared on the Enscape user forum, here. Head there is see, and be part of, the conversation sparked around this exciting topic! The post is re-posted here with permission.
Also, check out my review of the Dell Precision 5750, what Dell calls the "world's thinnest, lightest and smallest 17" workstation" click here. You will see a lot of Enscape in this post:)
For BIM Chapters updates, follow @DanStine_MN on Twitter or connect on LinkedIn
Check out my video-based courses on ArchSmarter.
I also write blog posts for Enscape - a new paradigm in rendering, animation and VR for AEC.
I want to share a workaround we’ve developed to set up a custom Enscape asset library. We’ve been using this workflow for 10 months and it has worked well for us. That said, use this at your own risk because it’s not officially supported by Enscape.
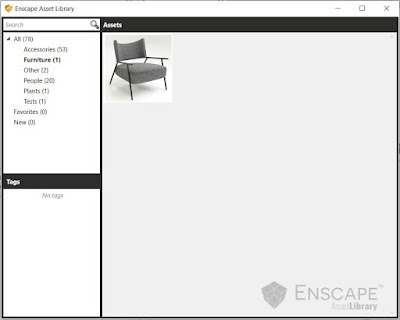
 |
| A screenshot of our custom library with 347 assets |
- A 3d model (.gltf file + .bin + textures )
- Optional: a simplified placeholder (.obj)
- Optional: a thumbnail (256x256 jpg)
- Our in-house Asset Generator tool
However, for this tutorial we will be using the powerful new Blender 2.82, as it’s free, open source and has a built in .gltf exporter.
keep reading to learn more...
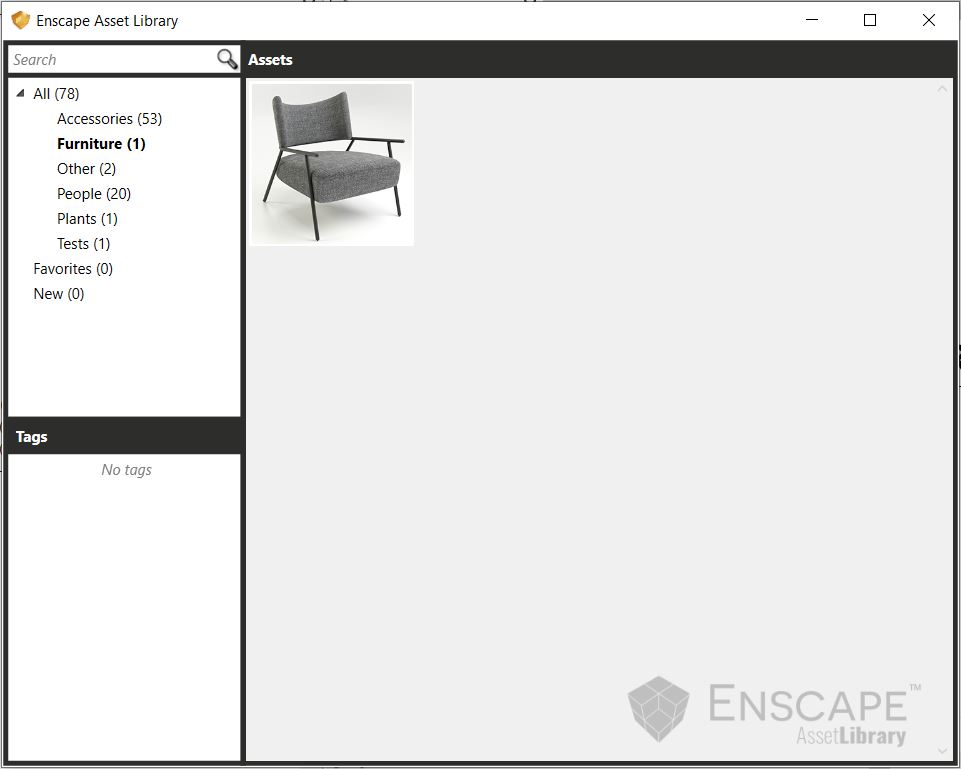
In this tutorial, we will be using Blender to convert the ‘Kai Lounge Chair’ model into an Enscape asset.
 |
| Kai Lounge Chair model |
Step 1: Exporting the rendering asset
- Download and install the new Blender 2.82
- Download the blender example file and its textures here.
- Open the blender file and select all the chair parts
- Go the File > Export > Gltf 2.0
- Set the export settings as shown in the screenshot below. Be sure to select “Gltf Separate (+gltf + .bin + textures)”
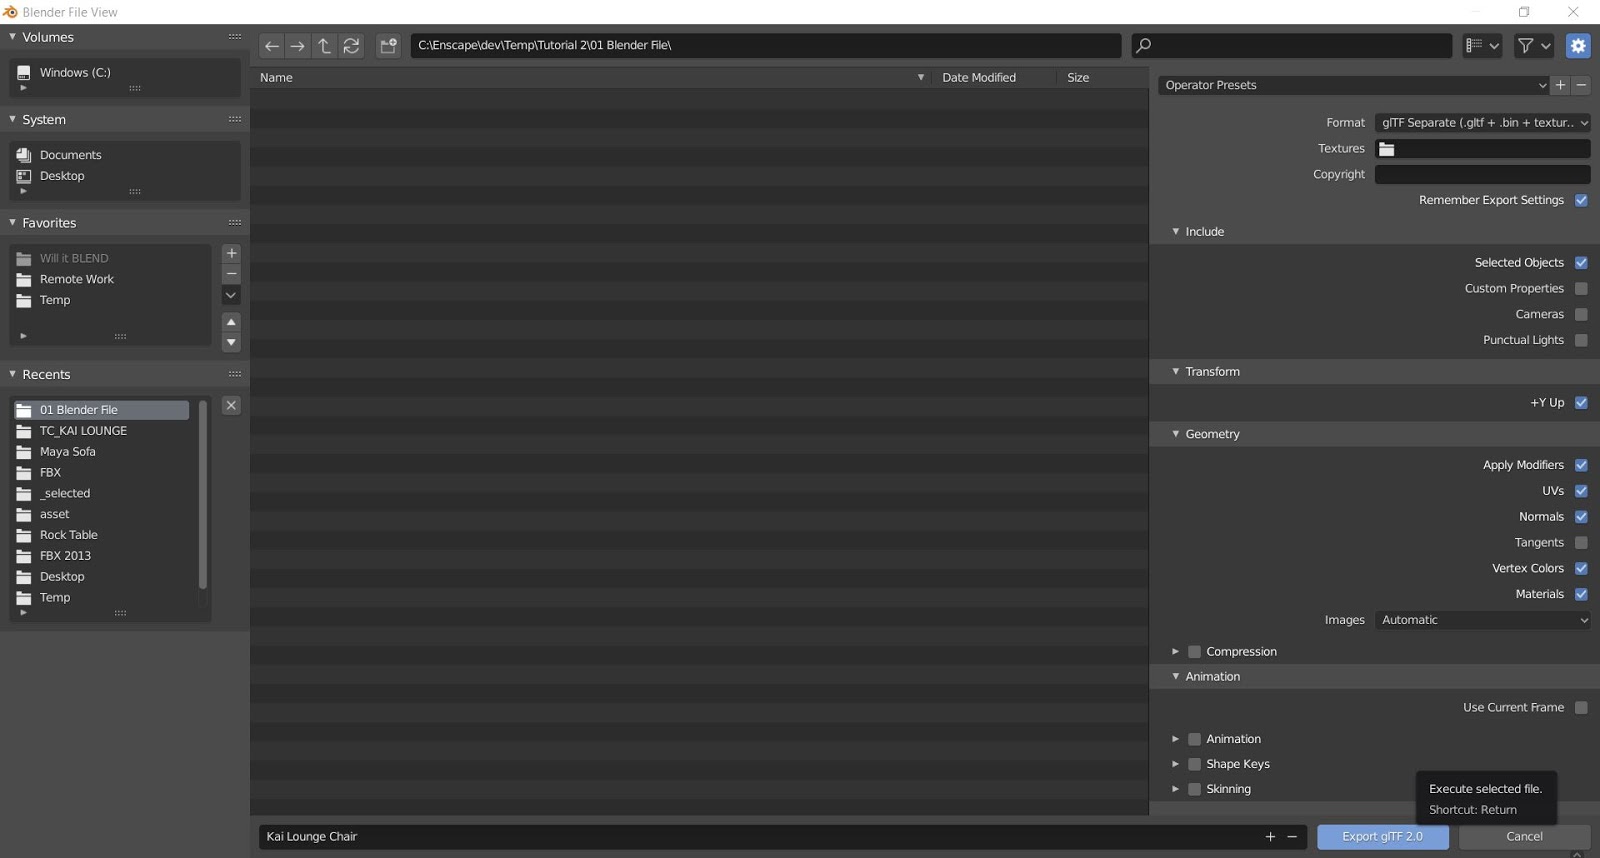 |
| Gltf export settings |
Step 2: exporting the placeholder geometry
The placeholder geometry needs to be exported as a triangulated obj file.- In the Blender file, turn the Enscape Asset collection off and turn the Enscape Placeholder collection on (layers are called 'collections' in Blender).
- Select the simplified geometry
- Go to File > Export > Wavefront (.obj).
- Set the export settings as shown in the screenshot below. Be sure to turn triangulation on.
 |
| Obj export settings |
Step 3: Thumbnail
The thumbnail should be a .jpg of 256x256 pixels.You can use Blender to render out a preview (the backdrop, lighting and camera are on the ‘rendering setup’ collection). Or you can render it later in Enscape and update the thumbnail. If you don’t add a thumbnail the asset creator will use a black square instead.
You can download the thumbnail for the Kai chair here.
Step 4: Creating the Enscape asset
Download our ‘Asset Creator’ tool here. Unzip it and run Asset Creator.exe. You should see this: |
| asset creator tool (developed in-house by A+I) |
 |
| asset information for the Kai Chair |
Step 5: Setting up a custom library
The following steps are to enable a custom library and only need to be done once.- Navigate to %USERPROFILE%\AppData\Local\Enscape
- Open Encape.config with Notepad
- Set the developer line to true: <IsDeveloper>true</IsDeveloper> (if you can’t see this line, add it)

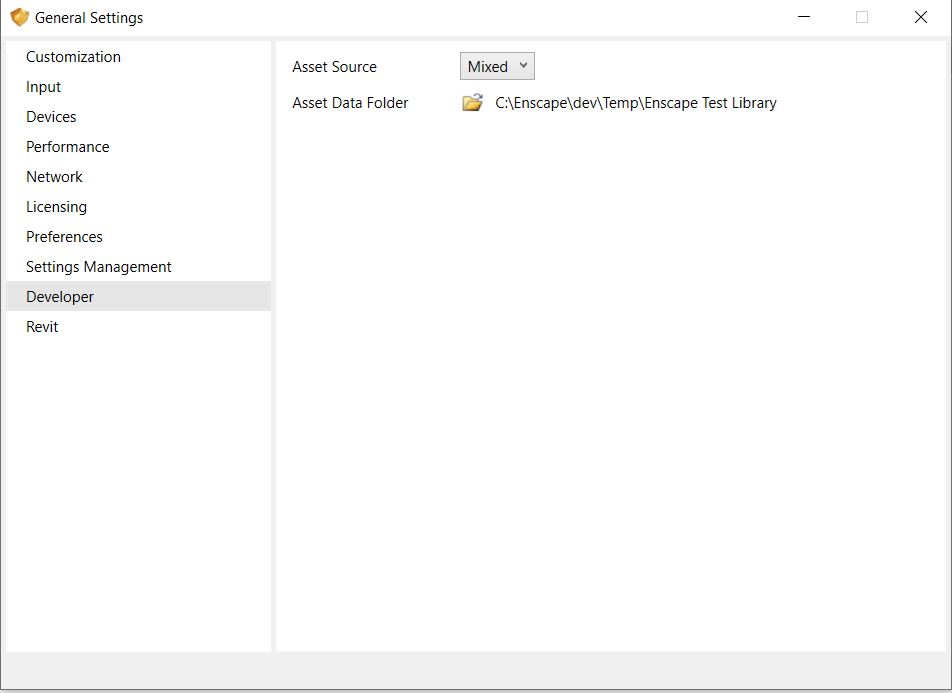
- Remote: Enscape will render standard assets only, the asset library panel will show the standard library
- Local: Enscape will render custom assets only, the asset library panel will show the custom library
- Mixed: Enscape will render both standard assets and custom assets, the asset library panel will show the custom library (this is what we use as our default)
Now, copy the files generated in step 4 (both the .json file and the data folder) into your library, using a subfolder ( D:\Asset Library\assetname\Output\ ). Note that the 'Output' part is not optional and it's capital sensitive (so not 'output').
We're done! Check the library panel in Enscape. You should see your asset there! If you had trouble following the tutorial, you can download an example of the files here.
Tips
- You might need to turn off your firewall in order to run the Asset Creator tool
- It’s important that none of the texture maps have spaces in their names. Remove the spaces before exporting to gltf
- When creating assets in 3ds max or blender, make sure to apply all transformations and place them at the origin
- If you are using Blender to export to Gltf, make sure to check ‘strip mimetype’ in the Asset Creator
- If you are using 3ds Max: more information on how to install the Babylon plugin can be found here.
- Keep placeholder geometry low poly, especially if you are working in Revit. The asset generator will warn you when you load in an .obj with more than 500 poligons.
- Previously created assets can be opened and modified with the Asset Creator tool (for example to update a thumbnail).
- We might post a tutorial later on how to optimize the Gltf materials for Enscape rendering (Enscape does a good job at rendering the default Gltf materials so for most assets it's not strictly necessary)
Acknowledgments
Special thanks to:
- Anton Cromas for helping to come up with this workaround
- Christian Radowski from Enscape who helped us with advice and tips when we got stuck
- Thomas Willberger from Enscape for encouraging us and allowing us to post this workaround here
I'm sure the Enscape team will release their official custom asset functionality soon, but we hope that this workaround might be helpful to some of you in the mean time.
Let us know if you found this interesting, or whether you're interested in sharing assets.
Closing note:
Pieter's tutorial first appeared on the Enscape user forum, here. Head there is see, and be part of, the conversation sparked around this exciting topic! The post is re-posted here with permission.
Also, check out my review of the Dell Precision 5750, what Dell calls the "world's thinnest, lightest and smallest 17" workstation" click here. You will see a lot of Enscape in this post:)
For BIM Chapters updates, follow @DanStine_MN on Twitter or connect on LinkedIn
Check out my video-based courses on ArchSmarter.
I also write blog posts for Enscape - a new paradigm in rendering, animation and VR for AEC.