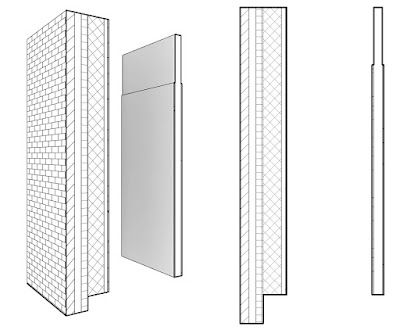
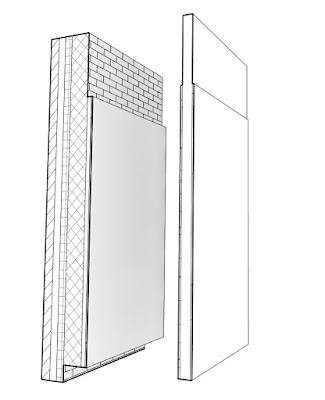
The layers in a Revit wall assembly have the ability to be unlocked so they can be adjusted vertically, apart from their adjacent layers.
Notice the two examples below, where the brick extends down to a brick ledge. Or, the wall studs continue to the structure above but the gypsum board stops just above the finished ceiling.
Learn all about this in today's post.
The steps to set this up are pretty simple... open the Edit Assembly dialog for the desired wall type, expand the Preview, and then (also see image below)...
- Switch the preview to Section
- Click the Modify button
- Notice the title just above this: Modify Vertical Stricture (Section Preview only)
- Click to select the edge of a layer
- Click to unlock the selected edge
- Make sure you see the unlocked icon, as this icon is tricky to click
Here is another example of unlocking a layer at the top of a wall.
There are some limitations...
- Multiple edges may be unlocked, but they must be adjoining layers
- Only one set may be unlock at the top and bottom
Due to the 'one adjoining set' limitation, I unlocked the wall studs rather than the two gypsum board layers. Conceptually, it would be better to unlock the gyp bd layers so the top of the wall would be set to the structure above and the gyp bd layers offset downward. Instead, due to this limitation, the top of wall value is to the gyp bd height and the stud layer is extended upward.
In the example below, since there is just finish gyp bd on one side of the wall, the gyp bd layer was unlocked. Notice, when the wall is selected, there are grips to graphically adjust the vertical location of the wall layers. But, also notice in properties, that a specific value may be entered for the Top and Base Extension Distance values. These parameters did not exist before unlocking the wall layers.
Fun stuff.
For BIM Chapters updates, follow @DanStine_MN on Twitter or connect on LinkedIn
Check out my video-based courses on ArchSmarter.
I also write blog posts for Enscape - a new paradigm in rendering, animation and VR for AEC.


