Searching the Asset library reveals a chain-link fence option.
When this asset is loaded into a Material, it contains several settings, such as image size, cutout and Bump.
The image below shows the images used to create a fence render appearance (visible in realistic and rendered views). For these images, I did a Google “Images” search and quickly found a tillable image of a fence. Then I made a copy of the image, edited it in Photoshop to look like the second image below (which took about one minute), and then assigned this image as the “cutout” on the Appearance tab. The black areas in the cutout image are the transparent portions as seen in the rendered image on the right.
For the fence example, you would still need to manually add the Identify and Graphics information manually. For example, the surface pattern and Texture Alignment (to make the drafting views and rendered views align).
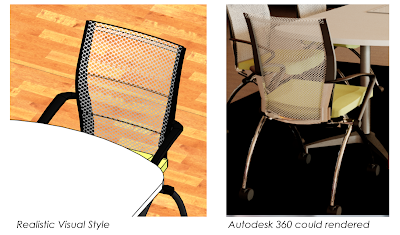
Another cutout example...
Back rest mesh material: cutout: Furnishings.Fabrics.Netting.Mask.jpg
Back rest mesh material: cutout: Furnishings.Fabrics.Netting.Mask.jpg
Another thing you can do is search the materials and textures folders on the hard drive. The image below shows the results from searching for “fencing” at this location (in Windows Explorer): C:\Program Files (x86)\Common Files\Autodesk Shared\Materials
As you can see there are several “fence” options not revealed in our previous searches (discussed above).
- TIP: Switch to thumbnail preview mode to see the images.
You can even search in the Revit dialog’s as shown below.
 |
| Searching within the Revit open/load dialog |


